
At the top of CreateSpace’s advantages is their online review process, which, as I found out later, is sophisticated and fast.
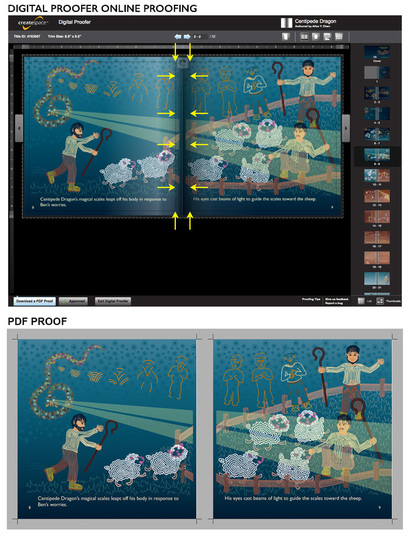
There are two versions of proofing available before you have to order a hard copy proof, shown in the figure: a digital online proofing system and a downloadable PDF proof. Near the top right of the interface are buttons for different ways of viewing: 3D, spread, single page, zoom, and multiple pages. On the right side are little icons of each page, indicating that you can scroll through all your pages.
The online digital proofer simulates your book as a real book. You even get the swooshing sound associated with the page-turning action!
Now let’s look at the PDF proof. Not as much going on, but the pages are presented in spread format, and crop marks show where your pages will be trimmed.
These proofing systems were somewhat confusing for me at first. For instance, in both views, my impression was that there would be a gap in the gutter of my book, rather than a seemless image spread.
Let’ re-visit the issue of gutters. Having never been through this process before, it was confusing to figure out whether I set up the gutters correctly. Take a look at the yellow arrows in the top image, or the virtual proof. The book is open, and the left page looks like it is even buckling upward as a real book page would do. The page is also framed by two sets of dotted lines; this is what the yellow arrows are pointing out. So, my question is, what are these lines representing? Where the page will be trimmed to? Where the pages will physically meet? Answer, next post!
An additional note on CreateSpace: there are no additional fees if you find errors in your proof and need to fix and re-upload. After all, this is why it’s called proofing, so the fact that other platforms charge every time you need to re-upload is frankly unfair. There are simply some problems you can’t see until you reach this stage.
 RSS Feed
