
Thanks for adapting to my new every other week posting schedule for the next few months!
So, HOW did I get around having to manually create all those regions overlapped by the transparent eye beam? Clearly I love this book enough to go through what I had gone through thus far, but frankly I don’t think ANYTHING would be worth this amount of painstaking work. Sorry.
I did the only thing I could think of, and that was to cheat.
The fundamental difference between the programs Adobe Illustrator and Adobe Photoshop is the method by which the artwork that you are creating, is “created” by each software’s programming. Adobe Illustrator is math-based, so when you draw a line, you describe it by its color, its length, and its quality through numbers and coordinates. If you recall from math class, a line that starts out thick, ends up thin, is really wiggly here, or smooth there, is described by x- and y- coordinates at each point at which it changes direction. So at MINIMUM, a line can be described as such:
Start point: x=3, y=10; end point: x=7, y=28.
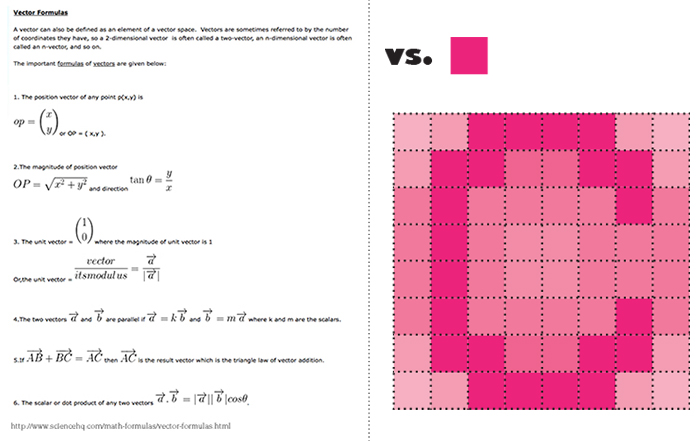
Now, add in a bunch of other numbers/equations to describe the thickness/thinness, the color, etc, et voila! You get how the information about a line gets stored for Adobe Illustrator! These are called vector formulas.
Imagine what those formulas look like with a drawing filled with lines, shapes, gradients, shadows, highlights, etc. etc.
Now let’s take a look at Photoshop (right side of image). When you draw in Photoshop, pretty much the only thing Photoshop cares about is: What color is that particular square in the grid of your canvas? That’s it.
So, when it came time for me to figure out how to represent all those regions that a change in color occurs due to the eye beam overlap, it made sense just to pixelate the entire picture by “converting” it to a Photoshop image.
You may be wondering why I didn’t use Photoshop in the first place? Answers, next post!
So, HOW did I get around having to manually create all those regions overlapped by the transparent eye beam? Clearly I love this book enough to go through what I had gone through thus far, but frankly I don’t think ANYTHING would be worth this amount of painstaking work. Sorry.
I did the only thing I could think of, and that was to cheat.
The fundamental difference between the programs Adobe Illustrator and Adobe Photoshop is the method by which the artwork that you are creating, is “created” by each software’s programming. Adobe Illustrator is math-based, so when you draw a line, you describe it by its color, its length, and its quality through numbers and coordinates. If you recall from math class, a line that starts out thick, ends up thin, is really wiggly here, or smooth there, is described by x- and y- coordinates at each point at which it changes direction. So at MINIMUM, a line can be described as such:
Start point: x=3, y=10; end point: x=7, y=28.
Now, add in a bunch of other numbers/equations to describe the thickness/thinness, the color, etc, et voila! You get how the information about a line gets stored for Adobe Illustrator! These are called vector formulas.
Imagine what those formulas look like with a drawing filled with lines, shapes, gradients, shadows, highlights, etc. etc.
Now let’s take a look at Photoshop (right side of image). When you draw in Photoshop, pretty much the only thing Photoshop cares about is: What color is that particular square in the grid of your canvas? That’s it.
So, when it came time for me to figure out how to represent all those regions that a change in color occurs due to the eye beam overlap, it made sense just to pixelate the entire picture by “converting” it to a Photoshop image.
You may be wondering why I didn’t use Photoshop in the first place? Answers, next post!
 RSS Feed
